Components
COMPONENTS
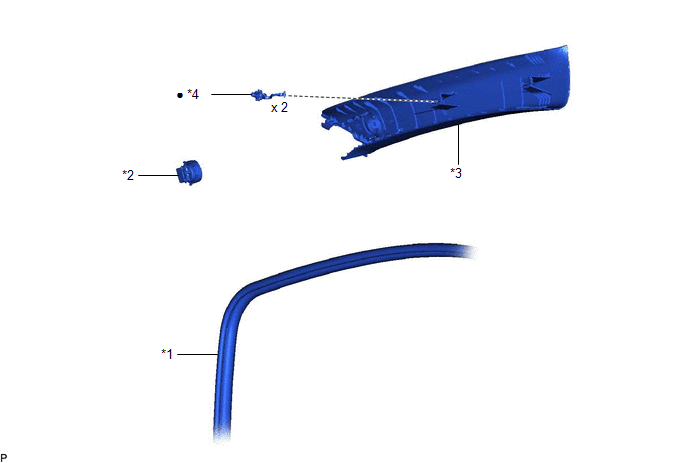
ILLUSTRATION
|
*1 | FRONT DOOR OPENING TRIM WEATHERSTRIP |
*2 | FRONT NO. 3 SPEAKER ASSEMBLY |
|
*3 | FRONT PILLAR GARNISH |
*4 | FRONT PILLAR GARNISH CLIP |
|
â—Ź | Non-reusable part |
- | - |
Inspection
INSPECTION
PROCEDURE
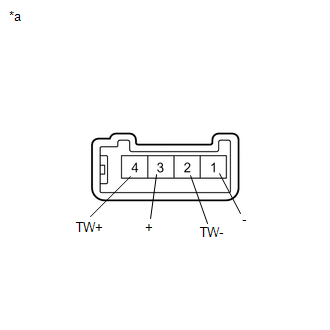
1. INSPECT FRONT NO. 3 SPEAKER ASSEMBLY
(a) With the speaker installed, check that there is no looseness or other abnormalities.
(b) Check that there is no foreign matter in the speaker, no tears on the speaker cone or other abnormalities.
| (c) Measure the resistance of the speaker. Standard Resistance:
If the result is not as specified, replace the speaker. |
|
(d) When there is a possibility that either the right or left speaker is malfunctioning, interchange the speakers and perform an inspection. If the malfunction disappears after interchanging the speakers, replace the malfunctioning speaker.
HINT:
Connect all connectors to the speakers when performing an inspection. If the result is not as specified, replace the speaker.
Installation
INSTALLATION
CAUTION / NOTICE / HINT
HINT:
PROCEDURE
1. INSTALL FRONT NO. 3 SPEAKER ASSEMBLY
NOTICE:
Do not touch the speaker cone.
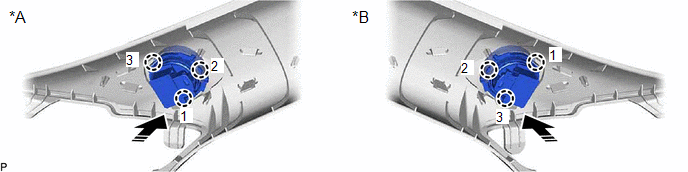
(a) Engage the 3 claws to install the front No. 3 speaker assembly as shown in the illustration.
|
*A | for LH Side |
*B | for RH Side |
 |
Install in this Direction |
- | - |
HINT:
Engage the claws in the order shown in the illustration.
2. INSTALL FRONT PILLAR GARNISH
Click here 
3. INSTALL FRONT DOOR OPENING TRIM WEATHERSTRIP
Click here
Removal
REMOVAL
CAUTION / NOTICE / HINT
HINT:
PROCEDURE
1. DISCONNECT FRONT DOOR OPENING TRIM WEATHERSTRIP
Click here 
2. REMOVE FRONT PILLAR GARNISH
Click here
3. REMOVE FRONT NO. 3 SPEAKER ASSEMBLY
NOTICE:
Do not touch the speaker cone.
(a) Disengage the 3 claws to remove the front No. 3 speaker assembly as shown in the illustration.
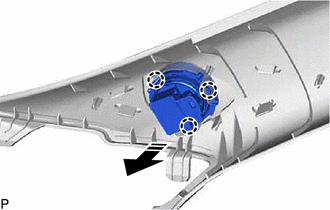
 | Remove in this Direction |
Toyota Avalon (XX50) 2019-2022 Service & Repair Manual > Lighting (ext): Lighting System(for Hv Model Without Cornering Light)
Automatic High Beam Switch Indicator does not Come ON DESCRIPTION When the automatic high beam system is on, the main body ECU (multiplex network body ECU) illuminates the auto high beam switch indicator. WIRING DIAGRAM CAUTION / NOTICE / HINT NOTICE: Inspect the fuses for circuits related to this s ...