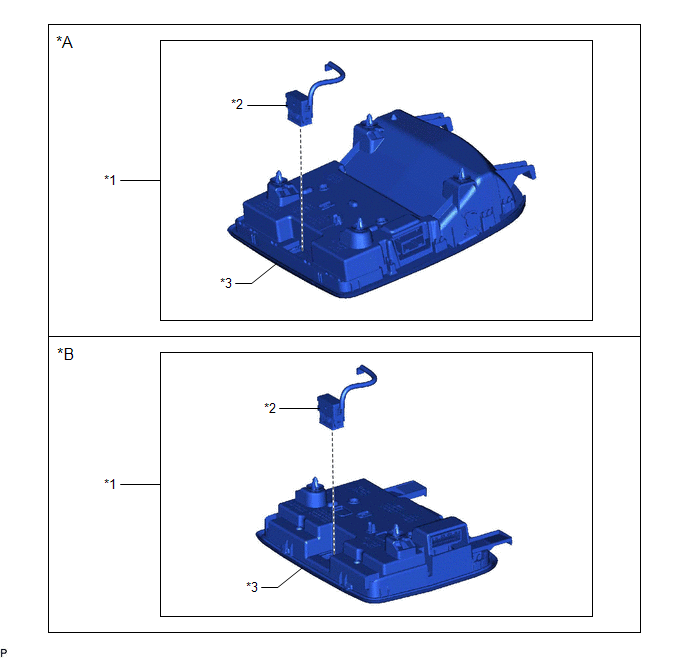
Components
COMPONENTS
ILLUSTRATION
|
*A | for Normal Roof |
*B | for Moon Roof |
|
*1 | ROOF CONSOLE BOX ASSEMBLY |
*2 | TELEPHONE MICROPHONE ASSEMBLY |
|
*3 | ROOF CONSOLE BOX SUB-ASSEMBLY |
- | - |
Installation
INSTALLATION
PROCEDURE
1. INSTALL TELEPHONE MICROPHONE ASSEMBLY
(a) for Normal Roof:
(1) Engage the 2 claws to install the telephone microphone assembly to the roof console box sub-assembly as shown in the illustration.
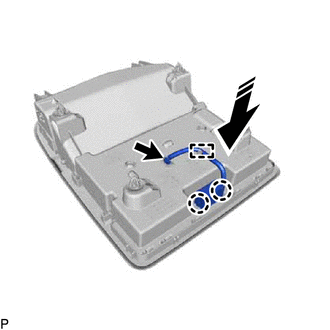
 | Install in this Direction |
(2) Engage the clamp.
(3) Connect the connector.
(b) for Moon Roof:
(1) Engage the 2 claws to install the telephone microphone assembly to the roof console box sub-assembly as shown in the illustration.
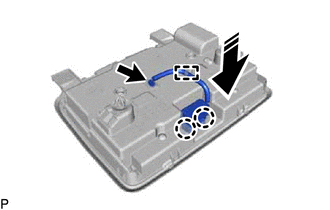
|
| Install in this Direction |
(2) Engage the clamp.
(3) Connect the connector.
2. INSTALL ROOF CONSOLE BOX ASSEMBLY
Click here 
Removal
REMOVAL
PROCEDURE
1. REMOVE ROOF CONSOLE BOX ASSEMBLY
Click here

2. REMOVE TELEPHONE MICROPHONE ASSEMBLY
(a) for Normal Roof:
(1) Disconnect the connector.
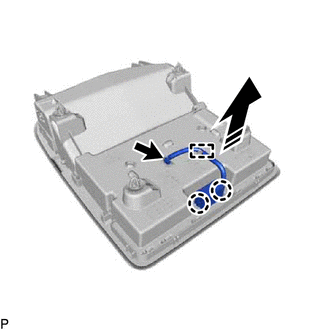
 | Remove in this Direction |
(2) Disengage the clamp.
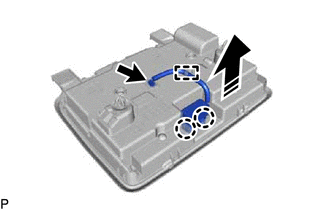
(3) Disengage the 2 claws and remove the telephone microphone assembly from the roof console box sub-assembly as shown in the illustration.
(b) for Moon Roof:
(1) Disconnect the connector.
|
| Remove in this Direction |
(2) Disengage the clamp.
(3) Disengage the 2 claws and remove the telephone microphone assembly from the roof console box sub-assembly as shown in the illustration.
Toyota Avalon (XX50) 2019-2022 Service & Repair Manual > Cellular Communication: Telephone And Gps Antenna(for Roof Side)
Components COMPONENTS ILLUSTRATION *1 TELEPHONE AND GPS ANTENNA ASSEMBLY *2 TELEPHONE AND GPS ANTENNA ASSEMBLY WITH COVER *3 COVER *4 WASHER AND HOLDER *5 SEAL *6 TELEPHONE ANTENNA HOUSING N*m (kgf*cm, ft.*lbf): Specified torque â—Ź Non-reusable part Installation INSTALLATION PROCEDURE 1. INSTALL TE ...


